
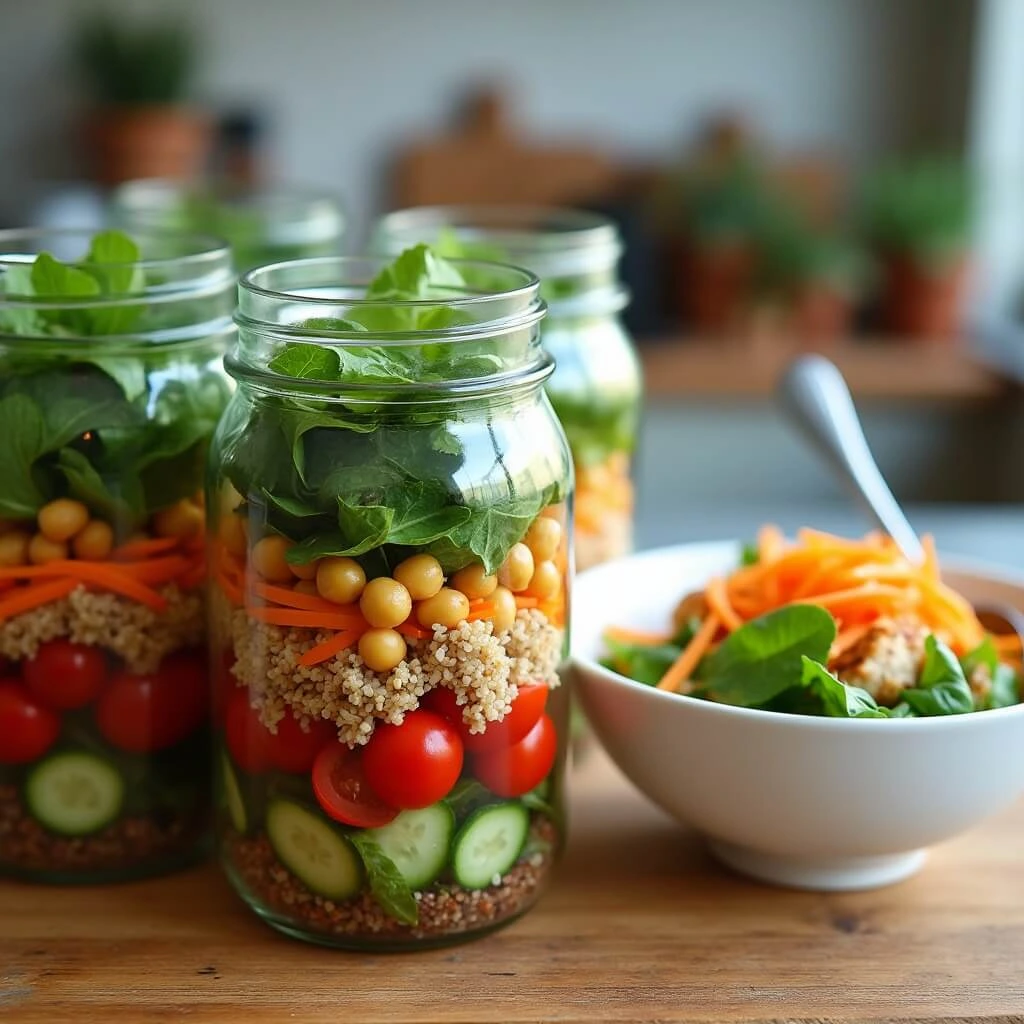
Looking for a healthy, grab-and-go meal that’s not only delicious but also incredibly easy to prepare Salad jars are the perfect solution for busy days when you need a quick, nutritious lunch or snack. Whether you’re meal prepping for the week or need a simple way to enjoy fresh ingredients on the go, salad jars are a versatile and customizable option. Packed with protein, colorful veggies, and healthy fats, these mason jar salads offer a balanced meal in every bite.
Table of Contents
Key Benefits of salad jars
Salad jars are more than just a trendy food container they offer numerous benefits that make them a game-changer for anyone looking to eat healthy, stay organized, and save time. Let’s explore why these layered, portable meals are becoming a staple in meal prep routines:
Easy Meal Prep and Time-Saving
One of the biggest advantages of salad jars is their ability to streamline your meal prep. By assembling salads in advance and storing them in mason jars, you can save time throughout the week. Here’s why:
Make Ahead: Prepare a week’s worth of salads in under an hour—no need to chop veggies every day.
Grab-and-Go: Once packed, your salad jar is ready to be grabbed out of the fridge and taken to work, school, or anywhere life takes you.
No Mess: Everything stays neatly layered and in place, so you don’t have to worry about soggy salads.
Freshness and Nutritional Value
When it comes to eating healthy, freshness is key. Salad jars preserve the integrity of your ingredients, which helps keep them fresh longer. By layering the ingredients correctly (with dressing on the bottom and delicate greens at the top), your salad stays crisp and delicious for days.
Longer Shelf Life: The dressing at the bottom prevents the greens from wilting, keeping your salad fresh for up to 5 days
Ingredients for salad jars
Now that you’re excited about making salad jars, let’s dive into the ingredients! The beauty of salad jars lies in their versatility you can mix and match according to your preferences or dietary needs. Whether you’re looking to create a protein-packed lunch, a refreshing vegetarian option, or a simple, light snack, these jars can be tailored to suit your taste. Here’s a list of the basic components you’ll need to get started:
Base Greens
The foundation of any good salad is fresh greens. These provide the essential vitamins, minerals, and fiber for a nutritious meal. Here are some popular greens to consider:
Spinach: Mild in flavor and packed with iron and antioxidants.
Kale: A bit heartier and loaded with vitamin K and fiber.
Arugula: A peppery addition that adds a bit of zing to your salad.
Mixed Greens: A mix of various lettuces and herbs for texture and variety.
Proteins
Adding protein to your salad makes it filling and satisfying. Choose a protein source that aligns with your nutritional goals. Here are some great options:
Grilled Chicken: A classic option that adds lean protein and flavor.
Chickpeas: Great for a vegan or vegetarian option, packed with protein and fiber.
Tofu: A versatile plant-based protein that soaks up flavors from the dressing.
Hard-Boiled Eggs: An easy and nutrient-rich protein source.
Beans: Black beans or kidney beans are excellent, hearty choices for plant-based meals.
How to Make salad jars
Now that you’ve gathered all your ingredients, it’s time to assemble your salad jars! The process is simple and fun, and it’s all about layering the ingredients to ensure freshness and flavor. Follow these steps to create a perfectly layered, portable meal:
Step 1: Choose the Right Jars
The foundation of your salad jar starts with choosing the right container. Mason jars are a popular choice because they’re sturdy, easy to clean, and come in various sizes. For salads, pint or quart-sized jars work well, depending on how much you want to pack in. You’ll need enough space for layering your ingredients while keeping them fresh.
Tip: Opt for wide-mouth jars if possible, as they make it easier to fill and remove ingredients.
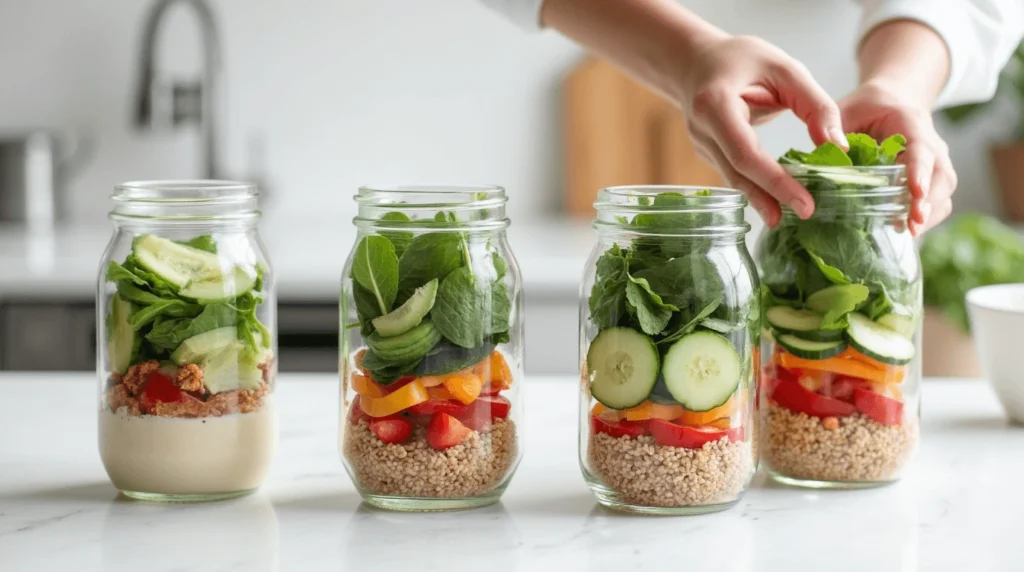
Step 2: Layer Your Salad Ingredients
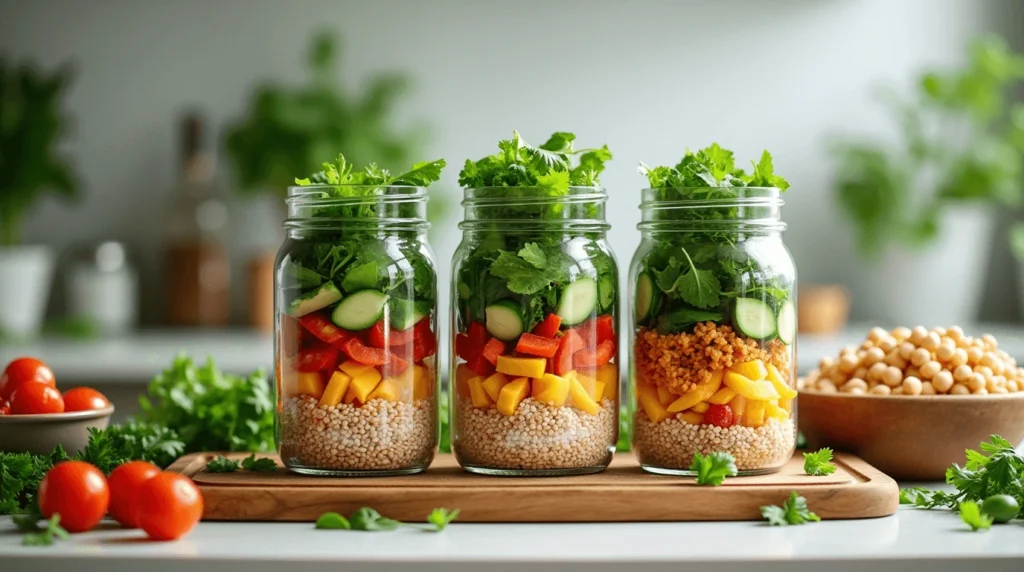
The key to making salad jars that stay fresh and crisp for days is the layering process. Follow this order to keep the ingredients at their best:
Step 1 Dressing: Start by adding your dressing at the bottom. This keeps the greens from getting soggy and helps the flavors meld together. If you’re using a thicker dressing, like Greek yogurt-based or tahini, you can adjust the amount to your preference.
Step 2 Protein: Add your protein next. Chicken, chickpeas, or tofu work great here. The protein layer also helps to protect the more delicate ingredients, keeping them fresh.
Step 3 Hard Veggies and Grains: Layer in your harder veggies (like cucumbers, carrots, or bell peppers) and grains (like quinoa or farro). These ingredients don’t absorb the dressing right away, so they stay crisp and maintain their texture.
Step 4 Leafy Greens: Place your greens at the top of the jar. These are the most delicate ingredients, so it’s best to keep them at the top to avoid contact with the dressing until you’re ready to eat.
Step 5 Toppings: If you have any toppings like seeds, nuts, cheese, or fresh herbs, you can either layer them at the very top or keep them in a small separate container to add right before serving.
Step 3: Seal and Store
Once your ingredients are layered to perfection, seal the jar tightly with its lid. You can store the jar in the fridge for up to 5 days, which makes it an ideal option for meal prep. The salad will stay fresh, and when you’re ready to eat, just shake it up to mix all the flavors together.
Tip: If you prefer your dressing on the side, you can store it in a small container to keep it separate until it’s time to eat.
Pro Tips and Variations salad jars
Now that you’ve mastered the basics of making salad jars, it’s time to elevate your creations with some pro tips and variations! These helpful suggestions will ensure your salad jars are packed with flavor, freshness, and versatility. Whether you’re making them for the week ahead or just a single meal, these ideas will give you the freedom to get creative in the kitchen.
Pro Tips for Perfect Salad Jars
Layering Is Key: The order in which you layer your ingredients matters. Always start with the dressing at the bottom, followed by proteins, hard veggies, grains, and finally, greens at the top. This keeps the ingredients fresh and prevents the greens from wilting.
Use Airtight Jars: To keep everything crisp and fresh, always use jars with tight-fitting lids. This will help preserve the flavor and texture of your salad for up to 5 days. If you’re using mason jars, be sure the lids are securely closed.
Prep the Night Before: Salad jars are great for meal prep, but if you’re in a rush, try prepping the jars the night before. They’re perfect for a quick, nutritious lunch the next day when you’re on the go.
Separate Wet and Dry Ingredients: If you’re adding toppings like croutons, nuts, or cheese, store them in a separate container and sprinkle them on top just before eating. This ensures they stay crisp and don’t get soggy in the jar.
Pack Ingredients Tightly: To maximize space and keep the ingredients from shifting, pack the jar as tightly as possible without crushing the items. This helps the flavors meld together while maintaining a clean, organized layer.
Creative Variations for Your Salad Jars
The beauty of salad jars lies in their versatility! Once you get the hang of the basic concept, you can mix and match ingredients to create a variety of delicious salads that suit your taste. Here are a few ideas to get you started:
Mediterranean-Inspired Salad Jar: Layer your jar with couscous or quinoa, cherry tomatoes, cucumbers, red onion, Kalamata olives, and grilled chicken or chickpeas. For dressing, try a lemon-oregano vinaigrette.
Asian-Inspired Salad Jar: Start with a base of rice noodles or soba noodles, then add edamame, shredded carrots, cucumber, and a protein like tofu or grilled shrimp. Top it off with a sesame-ginger dressing and a sprinkle of sesame seeds for extra crunch.
Southwest Salad Jar: Layer black beans, corn, diced avocado, and cherry tomatoes on top of a base of quinoa or brown rice. A tangy lime-cilantro dressing will tie everything together, making for a flavorful and filling meal.
Vegan Salad Jar: For a vegan-friendly option, try adding chickpeas, roasted sweet potatoes, kale, and quinoa. You can use a tahini-lemon dressing for a creamy, plant-based option that’s full of flavor.
Breakfast Salad Jar: Start your day with a protein-packed breakfast jar! Layer scrambled eggs, sautéed spinach, avocado, cherry tomatoes, and whole-grain toast croutons for a filling and nutritious breakfast option.
Dressing Tips
The dressing can make or break your salad, so it’s important to use the right amount and the right kind:
Don’t Overdo It: Too much dressing can make your salad soggy. Start with a small amount and add more if needed after you shake or mix it.
Homemade Dressings Are Best: While store-bought dressings are convenient, homemade dressings are fresher and can be customized to your taste. A simple vinaigrette with olive oil, vinegar, mustard, and a dash of honey can go a long way.
Keep Dressing on the Side: If you prefer to add the dressing when you’re ready to eat, store it in a separate small container to preserve the freshness of your salad.
Serving Suggestions salad jars
Now that your salad jars are prepped and ready to go, it’s time to enjoy them! Whether you’re packing them for a busy workday, serving them for a weekend lunch, or enjoying a quick dinner, salad jars can be served in a variety of ways to suit different occasions. Here are a few tips and ideas for how to serve your mason jar salads:
Straight from the Jar: The Ultimate On-the-Go Option
If you’re in a rush and need a quick, healthy meal, serving your salad straight from the jar is the easiest and most convenient option. Simply shake the jar to mix the dressing and ingredients, and you’re good to go. The tight seal on the jar helps keep everything fresh, and you don’t have to worry about spilling or making a mess. This is perfect for:
Lunch at work: No need to pack extra containers, just grab and go.
Picnics: Easy to transport and serves as an all-in-one meal.
Traveling: Keep your salad fresh even when you’re on the road.
Transfer to a Bowl for Sharing or Eating at Home
If you prefer a more traditional approach or want to share your salad with others, you can transfer your salad from the jar to a bowl. This is also a great option if you like to add extra toppings, such as:
Croutons: Give your salad a crunchy twist.
Grilled Meat: Add grilled chicken, steak, or tofu on top for added protein.
Extra Dressing: If you want your salad extra flavorful, drizzle some more dressing on top.
Cheese: Add a sprinkle of feta, goat cheese, or Parmesan to bring some richness to your salad.
Transferring to a bowl also allows you to toss the salad properly, ensuring that each bite is coated with the delicious dressing.
Pair with Other Meals for a Complete Meal
Salad jars are incredibly versatile and can easily be paired with other dishes for a complete meal. Here are a few ideas for what to serve with your salad jar:
Soup: A warm soup pairs perfectly with a fresh, cold salad. Try a creamy tomato soup or a light vegetable broth to balance out the crunch of your salad.
Wraps: Make a delicious wrap with grilled chicken or roasted veggies to complement your salad. This makes for a filling and balanced lunch or dinner.
Grilled Sandwiches: Pair your salad with a hearty sandwich, such as a grilled cheese, veggie panini, or turkey club.
Healthy Snacks: Serve alongside some crunchy snacks like air-popped popcorn, roasted chickpeas, or a handful of almonds for an extra boost of energy.
Garnish for Extra Flavor
Want to take your salad jar to the next level? Add some final touches with creative garnishes that bring a burst of flavor and color:
Fresh herbs: Cilantro, parsley, or basil add a refreshing burst of flavor.
Spices: A sprinkle of chili flakes or black pepper can give your salad a bit of heat.
Seeds and Nuts: Pumpkin seeds, sunflower seeds, or almonds add
Conclusion
Salad jars are not just a convenient and healthy meal option—they’re a game-changer for anyone looking to eat nutritious meals without sacrificing time or flavor. By layering your favorite ingredients in mason jars, you can create a balanced, grab-and-go lunch or dinner that’s as versatile as it is satisfying. Whether you’re meal prepping for the week or need a quick lunch to take on the go, salad jars have you covered.
The beauty of these salads lies in their endless customization possibilities. You can mix and match ingredients to suit your dietary preferences, from protein-packed options to vegan-friendly combinations. Plus, with the right storage and layering technique, your salad will stay fresh and delicious for days, making it perfect for busy schedules.
So, what are you waiting for? Get creative with your salad jars and enjoy the ease and benefits of healthy, homemade meals anytime, anywhere. Whether you’re a seasoned meal prepper or a newbie in the kitchen, salad jars are a fun and easy way to stay on track with your health goals without compromising on taste. Happy jar-creating
FAQs salad jars
Before you get started making your own salad jars, you might have some questions. Don’t worry! We’ve gathered the most common queries to help you make the most of your mason jar meals. Whether you’re new to meal prepping or a seasoned pro, these answers will guide you to salad jar success.
How long can I store salad jars in the fridge?
One of the best things about salad jars is that they can be stored in the fridge for up to 5 days. The key to keeping them fresh is in the layering. By placing the dressing at the bottom and the greens at the top, the ingredients remain crisp and fresh. Just shake them up when you’re ready to eat!
Can I freeze salad jars?
While it’s best to store salad jars in the fridge, freezing them is not recommended. Freezing can cause certain ingredients, like lettuce and cucumbers, to become soggy when thawed. However, you can freeze individual ingredients (like proteins, grains, or beans) before assembling the jars.
Recipe Recap:
Prep Time: 15 minutes
Cook Time: 0 minutes (no cooking required)
Total Time: 15 minutes
Servings: 4-6 servings (depending on jar size)
Calories: Approximately 300-400 calories per serving (varies depending on ingredients)
Nutrition Information (per serving):
Calories: 350 kcal
Fat: 18g
Saturated Fat: 3g
Trans Fat: 0g
Carbohydrates: 35g
Fiber: 7gSugar: 5g
Protein: 12g
Cholesterol: 45mg
Sodium: 350mg
Potassium: 450mg
Vitamin A: 20%
Vitamin C: 30%
Calcium: 10%
Iron: 15%
Categorize the Recipe:
Course: Lunch, Dinner, Snack
Cuisine: Healthy, Mediterranean, Vegan (optional)
Diet: Gluten-Free (optional), Vegan (optional), Low-Carb (optional), High-Protein, Dairy-Free (optional)
Method: No-Cook, Meal Prep, Layering
This recipe recap gives readers a quick, clear overview of the salad jar recipe, making it easy to understand the essential information and nutrition facts. The categorization helps users find it easily according to their needs and preferences. Let me know if you need further adjustments
1 thought on “Salad Jars Ultimate Guide To Healthy, Grab And Go Meals”
Comments are closed.